One Way North - My Hike of the Vermont Long Trail
I recently completed a northbound thru hike of the Vermont Long Trail. This page provides notes on my experience in case it helps others. There are many good travel logs by Long Trail hikers out there, mostly in video format. Instead of providing yet another day-by-day account of the trail, I’m treating this page like a how-to guide.
There are many ways to have a successful thru hike of the Long Trail. Here I document one way that worked for me. I’m certainly not claiming that this is the only way, or even the best way to hike the Trail. This is just one way that worked for a 57 year-old first-time thru-hiker in reasonably good physical condition and with some basic backpacking experience.
You may come up with a much better way. Hike your own hike!
General Overview
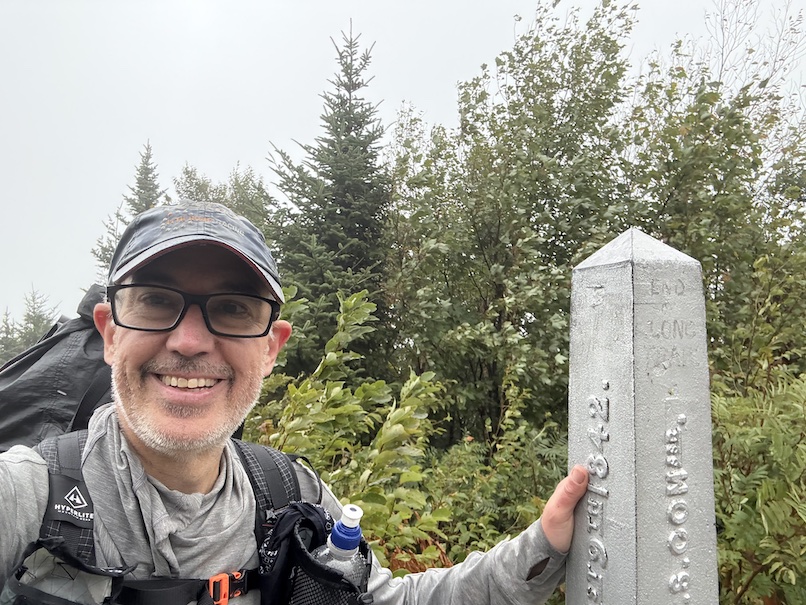
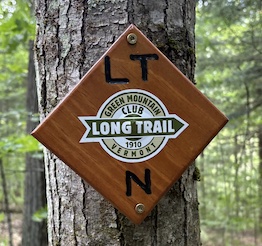
The Long Trail follows the Green Mountains of Vermont from the Massachusetts border to the Canadian border. The Trail is 273 miles long and requires about 65,000 feet of elevation gain. I started my hike on Tuesday, August 5 and ended on Saturday, August 30, 2025. I started at the Route 2 crossing of the Appalachian Trail (AT) in North Adams, MA and spent my first night on the AT in Massachusetts, so technically my Long Trail (LT) hike required 24 days. I took one day off.
I averaged around 11 miles per day with a range of around 5 miles on the short end to a few long days of ~17 miles.
My Training
A hike of this magnitude requires a lot of physical training, particularly if you want to enjoy the trip. I started off in reasonably good shape, but my preparation started about a year before I stepped onto the trail in North Adams. Key elements of my training:
- I walked 5-12 miles every day for a year leading up to the hike. My longer training days were often made up of two walks, one in early morning and one in the evening before dinner.
- I did basic weight training at a local gym for about 6 months prior to the hike. I used weights every other day and rotated through push (arms), pull (arms), and legs. You will use your arms a lot on this trip so don’t neglect that part of your training. In my view, weight training is the most effective step you can take to avoid injury on a long-distance hiking trip, especially for us older folks.
- My wife and I walked the West Highland Way in Scotland 3 months prior to the trip. This was a ~100 mile trip in 6 days with two >20 mile days. This was not a backpacking trip and the terrain was much easier than the Green Mountains of Vermont, however it was very helpful to get used to walking for multiple consecutive days (some in the pouring rain) without days off in between. I also liked the chance to test my socks/shoes and to make sure that blisters weren’t going to be an issue. You don’t need to go to an exotic location to have a training hike like this, just be sure to hike multiple long days consecutively to get used to that experience.
- I lost about 25 pounds during the training process and got to a BMI target of 24. Coincidentally (or not), my pack weight was around 25 pounds. Anyone who plans to spend a lot of time/money getting into “ultralight” gear should first make sure that they are <=24 BMI.
I completed the hike, I didn’t get injured, and I had very little soreness along the way. Yes, my legs were very tired every night.
Time of Year
I hiked in August. I think August is a good compromise between weather (i.e. not too cold, reasonably dry) and low bugs.
Another side-benefit of August on the LT is that you start directly in the midst of the northbound (NOBO) and southbound (SOBO) Appalachian Trail thru-hikers. This provides access to trail expertise and camaraderie during the early days of your LT hike. I met some very nice AT hikers and they taught me a lot (esp: Yellow Shoes, Knots, Swede, Tee Time, 62, Chef, Earlybird, Tagless).
By the time you pass Maine Junction north of Killington and the AT folks take a right towards New Hampshire you will be well trained. The LT crowd is much thinner, but I never had a case where I was alone in a shelter.
One thing worth mentioning here is that the relatively large AT “bubble” I experienced in early August included a surprising number of weed smokers. I’ve got no problem with people “hiking their own hikes” (so long as they aren’t bothering others and are keeping it away from the shelters) and I think this might actually be legal in Vermont, so I share this only so that others won’t be too surprised when they encounter smokers on the trail. For what it’s worth, it seemed to be younger AT NOBOs partaking in this particular recreation. Not so much amongst the AT SOBOs, and I never saw it again after I passed north of the Maine Junction where the LT and AT split.
Hiking Alone?
I “hiked alone” until the last three days when a friend joined me for the final push to Canada. But “alone” isn’t really alone, at least not in August on the LT. I encountered a lot of north-bound and south-bound hikers on the trail. I doubt that I ever went more than two hours without passing or being passed by some other hiker in the south, or perhaps four hours at most in the north. Occasionally I was the first at a shelter or tent-site but someone else would always roll in before the end of the day. 99% of the folks I encountered we very friendly. The other 1% probably just weren’t getting enough calories.
As I moved north I started to see some of the same people on a regular basis which was a great feature of the trip. It’s surprising how much more quickly/easily community forms on the trail vs. the real world.
So if you’re worried about doing the trail by yourself, don’t be. You’ll be fine.
Pace/Itinerary
I’ve attached my itinerary here in case you’re interested. It’s probably not possible to pre-define your exact itinerary on the LT because of different variables that may come up. I planned conservatively and ended on the day I had originally targeted.
I hiked northbound. LT SOBO hikers are a bit crazy in my view, but I have huge respect for that added challenge. A SOBO hike would not be a good idea for a beginner. You need the easy miles in the south to prepare for the brutal miles in the north.
My itinerary philosophy boiled down to the following:
- For the first week average around 8 and never go more than 12 miles a day. More on this below.
- Pay attention to the elevation profile and dial back mileage as needed. I only had a few days that involved more than 4,000 feet of ascent. Any day that has more than 700 ft/mile of ascent is going to be very hard.
- Be flexible around Camel’s Hump and Mount Mansfield to avoid exposure in bad weather. There are bad weather blue-blazes that can be used if you need to stay on schedule and don’t want to cross the dangerously exposed peaks. However, steep slippery down sections need to be taken extremely slowly, even on the bad-weather bypasses. I was lucky and had perfect weather for Camel’s Hump and good enough weather for Mansfield so no bad-weather bypasses were needed.
- Sometimes blue-blazes are needed to see the best views (Killington, Belvedere for example), factor those miles into your plans and take it easy coming down.
- Sometimes the shelters are on blue-blazes of up to 0.3 miles away from the main line. The FarOut mileage doesn’t always factor that in walk. :-)
- A very rough rule of thumb that I developed: I was able to climb about 1,000 feet per hour. Camel’s Hump and the Needle’s Eye section of Mansfield were (slower) exceptions to this rule.
- In the north I felt like a “fast” pace was about 1.75m/hour, but I often had sections that were slower than that. I’m sure that seems slow to many, but you need to adjust for the terrain.
- The trail changes noticeably after the LT/AT split. Things are more overgrown, there are many more blow-downs, there are fewer people, it’s a bit easier to lose the trail, and the general “vibe” is different. I really liked the north.
Walking
You’re ready to walk a lot, right? A few things about my walking philosophy:
- I set my alarm for 5:00 AM so that I was standing on the trail when it became light enough to hike safely. In August that was around 6:00 AM. An early start allows you to walk more slowly and take more breaks.
- I forced myself to walk very slowly during the first 30 minutes of each morning. This provided a good warmup and reduced the chances of injury.
- I tried to end my hiking day between 3:30 PM and 5:00 PM (August).
- Personal preference: I liked to get up, pack up, and start hiking before eating breakfast. I stopped for a hot breakfast somewhere between 2-4 miles down the trail, generally at a good water source and ideally at a swimmable location. I found that overlapping my first break with breakfast was efficient and tricked my body into getting the first few miles “for free.”
- Personal preference: I liked to get into camp on the earlier side and get first crack at selecting a flat tent site.
- I never hiked before dawn or after dark. The blazes are usually pretty good, so it is theoretically possible. Scheduling night hikes to push more miles is asking for trouble in my view. Headlight hiking should be for emergencies only.
- I used hiking poles. This is critical to protect your knees. There were also some down sections that I’m not sure I could have navigated without poles.
- I only had three falls. In my experience, if I found myself tripping much this meant that (a) I was tired and/or under-caloried and should stop for a snack break (b) I was moving too quickly (c) I was not focused on my footing. I heard some people on the trail talking/bragging about how often they were falling during the trip - my guess is that those people were hiking too fast.
- Walking on rough terrain requires focus to avoid injury. Don’t multi-task. If you need to check your map, stop. If you need to take a drink, stop. If you need to text a shuttle driver, stop.
- Don’t underestimate the fall danger on blue-blazes or around water sources. Bring your poles and use caution even when you’re not on the main line! Some of the most dangerous/slippery places I encountered were around awkward water sources.
- Blow-downs are common on some sections of the trail. For large/complex blow-downs, I found that the faster I took off my pack, the faster I was through the blow-down. It can be tempting to resist this and attempt to navigate a large blow-down while wearing a pack, but I often got stuck and ended up wasting more time than I saved.
- On the chilly mornings it was better to spend the first few minutes of the day cold than to be over-dressed and need to immediately stop and re-dress/re-pack during the first climb.
Start Slow
You’ve already heard this advice many times, so I don’t need to belabor the point. The most common problem that I saw on the trail was repetitive stress injury. And most of the time this involved hikers who had started making big miles early in their trip. I kept my daily milage under 12 for the first week of the trip to avoid this problem.
All of the AT hikers that I met on the first few days of my trip (they were around mile 1,600) shared the same advice with me: start slow.
This is a difficult limit to enforce, especially in the first few days of the hike. When you roll up to a shelter at 2:00 PM feeling great it’s hard to resist the temptation to keep hiking. Trust me, just stop. I brought a book with me on the first part of the trip and it provided something to fill the down time and reduced the temptation to press to another shelter.
You’ll meet some nice AT hikers and will likely want to hike with them. Keep in mind that these folks have been hiking for multiple months and have covered >1,600 miles. Don’t pace yourself against seasoned hikers during the first few days of your hike. Start slow.
Mental Approach
A lot of people talk about the mental challenge of long-distance hiking trips. After doing something like this for almost a month I can attest that it is a mental challenge. A few points that may be helpful in this regard:
- I suspect that most people who say they are struggling mentally are really just tired, sore, and hungry. Take your physical preparation seriously, take it slow, rest when you need it, and carry enough calories. You’ll be fine.
- Take the hike one 1/2 day at a time. I sometimes became overwhelmed when I started to think/plan too far down the track. Just get yourself to the next shelter safely and efficiently. You’ll be fine.
- Sometimes I met people hiking in the opposite direction who shared scary-sounding descriptions of upcoming trail features. Very often these descriptions turned out to be over-blown. Don’t dwell much on other hikers’ trail descriptions, particularly fear-mongering - everyone experiences the trail differently. We’ve all heard about “type-2 fun” (i.e. things that were hard at the time, but seemed very fun in retrospect), but I think there is also a phenomenon like “type-2 horror” when things that really weren’t that hard in the moment seem very difficult in retrospect. And it may actually be fun/stress-relieving to talk about how incredibly difficult things were. Don’t get stressed out, you’ll be fine.
- Keep in mind that everything about the journey is impermanent. All torrential rain storms and all ridiculously steep climbs will pass. You’ll be fine.
- No matter how much of an introvert you are (like me), the people you meet along the trail are a blessing. Stop and talk to other hikers. Even if you are a tenter, make a point of introducing yourself to everyone else at the shelter. Eat dinner with the group. This will greatly improve your mental state. You’ll be fine.
The thought of not finishing the Trail never entered my mind.
Resupply/Town Stops
I made 6 town stops:
- Bennington, in and out to pick up a box at the PO and to have lunch at the Madison Brewing Company.
- Manchester, NERO and an overnight at the Hampton Inn.
- Killington, NERO and an overnight at the North Star Lodge. Lunch at the Inn at Long Trail. (NOTE: The name notwithstanding, this inn is not on the Long Trail, but rather is on a blue-blaze coming down from Killington. The walk east on VT4 to the inn takes about 25 minutes and is worthwhile). I would have stayed at the Inn if there were rooms available.
- Warren, NERO and an overnight at the outstanding West Hill House B&B.
- Waterbury, NERO and a ZERO at the outstanding Old Stagecoach Inn. Lunch at McGillicuddy and Maxis, dinner at Blackback.
- Johnson, in and out to resupply at the Johnson Hardware Store and to have lunch at the Maplefields.
I was happy with this plan. I only had one day off with no hiking (Waterbury), but this zero day was essential for physical and mental recovery, particularly between Camel’s Hump and Mount Mansfield.
I did my laundry at all town stops except Bennington and Johnson.
The in-town meals were very important to address the inevitable calorie deficit that you experience on the trail. Take your time, relax, and eat a lot.
One thing I learned from busy town road crossings is that you may encounter a ride opportunity faster than you expect. I found it helpful to have my money/credit cards, Garmin, and phone assembled into my electronics dry bag (and in hand) just prior to exiting the woods. It’s good peace of mind to have these things with you if/when you get separated from your pack as it gets thrown into a trunk or the back of a pickup truck on the side of a busy road. There are a lot of nice people living near these trail towns and I was constantly surprised by the help I received.
Gear
I’m not a big gear nerd and there is already plenty of material on the internet about LT packing lists so I’m not going to list out all of my gear. Reach out if you care. Suffice to say, I am not an ultra-light hiker and I say that with confidence after seeing some actual ultra-light hikers on the trail. From my experience, my base weight of ~20 pounds put me in the middle of the range of hikers I met along the way. Many had lighter packs and many had heavier. Lighter is better for sure, but I doubt that 5 pounds more or less would have made much of a difference in my success/enjoyment.
My “big three” consisted of:
- Hyperlite Mountain Gear 55L Southwest pack (black). This is the most durable version of the HMG packs, which is important given the amount of times you’ll scrape/snag your pack on rocks and trees on the LT. Yes, it’s a bit heavier. I used the tried-and-true contractor bag to keep things dry inside and did not use a pack cover. I never had a problem with things getting wet, even during a few bad rain storms. One thing I particularly liked about the Southwest pack is that I could easily fit my tent, Tyvek ground sheet, and rain jacket in the outside pocket of my pack. None of the really wet things ever needed to go inside the pack.
- Big Agnes Copper Spur UL1 free-standing tent. I’m 5’ 11” and found the 1-person to be comfortable. I kept my pack outside under the “vestibule” and it stayed dry, even through a few bad rain storms. I used the trekking pole vestibule configuration twice when I needed to cook in rainy conditions and that worked fine. I brought a few short pieces of paracord which were useful for (a) clotheslines inside the tent or (b) anchoring tent corners when pitching on wooden platforms. The tent dries quickly when left in the sun.
- 6x9 Tyvek sheet ground cover
- Enlightened Equipment Revelation 20 quilt
- A silk sleeping bag liner
- Therm-a-Rest NeoAir NextLite NXT sleeping pad. Comfortable enough, and not too loud.
- Gossamer Gear 1/8” foam pad - particularly important for protecting your fragile sleeping pad from shelter floors. Also a great sit/nap pad.
I was happy with all gear selections and wouldn’t change anything.
I see a lot of people online obsessing about UL and pack weights. As my wise son pointed out before one of our trips, it might be more productive to improve your diet and loose 5 pounds off your body than to figure out how to loose 5 pounds from your pack.
Footwear
I wore Topo Athletic Pursuit 2 shoes, Injingi sock liners, and Darn Tough quarter length socks. I was very happy with this combination, particularly the traction provided by the Topo shoes. Maybe I was seduced by the marketing, but I’m a huge fan of the wide toe-box and zero drop combination.
I often hear people say that they feel the need to wear hiking boots or some other type of high shoe that provides more “ankle support.” I’m not a doctor, but I strongly suspect that anyone who thinks that their foot health depends on the height of their shoes should probably not be hiking on the Long Trail. The terrain is insanely rough and, when push comes to shove, your shoes are not going to provide any significant ankle protection against the uneven, steep, muddy, rocky, rooty, blown-down, tangled treadway that is the LT. Instead, take a another few months of prep using a combination of weight training and elastic “Theraband” training. When you feel confident hiking on challenging terrain wearing normal trail-running sneakers you are ready to go. Before that, you are probably an injury waiting to happen. Of course, if you wear a certain kind of boot/shoe because it’s comfortable for you that’s what you should wear.
NOTE: My characterization of the LT trail conditions is not meant to be a criticism of the GMC trail maintainers. To the contrary, the trail is very well maintained. At the same time, the trail is very rugged in many places.
Clothing
This isn’t comprehensive, but a few notes on the frequently asked items:
- I hiked in shorts 100% of the time, I didn’t bring long pants.
- I used my rain pants for warmth in the evenings and mornings about 5 times.
- I wore my sun hoodie in the morning on the trail a few times, but dropped to a normal t-shirt on the first climb.
- I wore my puffy jacket once on the entire trip (evening on Jay Peak).
- I had a bug net but never used it.
Communications/Electronics
I carried an iPhone 16 (Verizon). I had enough service to text/call home at least a few times a day, particularly from higher elevations. Many shelters had at least one bar of Verizon coverage.
One of the emotional highlights of my trip happened 2 days before the finish when I turned on my phone at the top of a modest mountain (Buchanan I think) and received a text message from Verizon that said: “Welcome to Canada! As talk, text, and data is included in your domestic plan you’ll have no additional charges while roaming.” That told me I was on a Canadian tower and getting close to the border!
I also carried a Garmin inReach Mini 2 to send check-in messages every night. This was helpful to fill in those places where mobile coverage was weak. The Garmin was paired with my iPhone to support text messages and to receive weather forecasts when needed.
Keep in mind that the Garmin inReach uses the Iridium satellite constellation which can be slow when there is no clear view of the sky (i.e. leaf-obstructed). I always turned on my Garmin and broadcast the “Check In” as soon as I reached camp knowing that the message could take up to ~30 minutes to be delivered. Sometimes it was much faster.
The latest iPhones have a satellite messaging capability that uses the Globalstar constellation. I used this feature when outside of mobile cellular range and was surprised to see that it usually worked more quickly than the Garmin inReach.
I carried a Nitecore NU25 (USB-C) rechargeable headlamp. Very rugged and efficient.
I carried an Anker 10,000 mAh power bank with a USB-C cable and a small charging block for town. I wasn’t setup for the high-speed PD charging capability but this didn’t matter.
I kept my iPhone in low-power and airplane modes, used my phone sparingly, traveled with my Garmin inReach off at all times, and limited headlight use. I never came close to running out of power on my trip.
I kept my iPhone in a plastic bag and in a velcro front pocket on my shoulder strap. Walking with a fragile phone in the pocket of your shorts is probably not a good idea on the Long Trail.
Navigation
I used the ubiquitous FarOut app on my iPhone. I also copied the 12 division maps from the Long Trail guide onto waterproof paper and carried the relevant page in my pocket. Having the paper map provided a good safety backup and made it easy to check progress without constantly using my phone.
FarOut is essential for a few purposes:
- Getting commentary on water sources - particularly in drought years like the one I experienced.
- Getting commentary on tent capacity at shelter sites.
- Getting phone numbers of shuttles/inns on the trail.
- Helping to recover in those few places where I lost the trail. It was great to know whether I was to the left or the right of the trail, particularly in those places where the trail “mistakes” are well-worn.
I found the FarOut coverage of the LT to be excellent.
Shelters/Tenting
I carried a tent and used it whenever possible. I slept in shelters 4 nights when tenting wasn’t allowed and/or available (no tenting above 2,500 ft is allowed). The shelter experience was great and I would encourage everyone to try it at least a few times. Yes, there were mice running around, but none bothered me that much. Mice are part of living in the woods.
In my experience the shelters were completely dark/quiet by 8:30 PM.
Even if you plan to sleep in shelters every night (which is theoretically possible), I would suggest carrying some form of alternate shelter. You never know where you’re going to be stuck out on the trail. I did see some crowded shelters in the south so keep the “no room at the inn” scenario in mind.
I slept in stealth tent sites between shelters twice on my trip. The most exciting stealth site was on the ski run just off the summit of Jay Peak on a pretty windy night. Not super flat, but well worth it.
I pitched on wooden platforms about 4 times and on the ground all other times.
Taking some time to select a flat tent spot is worthwhile. The only bad nights I had on the trail were caused by overly sloped tent sites. Otherwise, I slept well.
I’m not a hammock camper. I did see a few hammocks on my trip and it didn’t seem like you’d ever have a problem finding suitable trees.
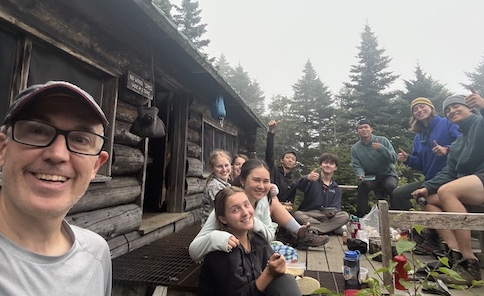
I met the Tufts University pre-freshman Wilderness Orientation trip at Taft Lodge just off Mount Mansfield. A great group - GO JUMBOS!
Privies
All shelter/tent sites that I stayed at had well-maintained privies. One can only imagine how much work must go into this system. To avoid any confusion, none of the back-country privies have toilet paper - you’re responsible for that. There were a few privies at trailhead parking lots that provided toilet paper, which feels like quite a luxury when you encounter it.
Water
I carried two Smartwater bottles with me at all times: 1.0L and 700mL. I generally used the 700mL bottle for hydration on the trail and carried the 1L for back-up and/or camp when approaching a dry shelter. I tried to limit the full carry of the 1L back-up bottle during significant climbs, but that wasn’t always possible due to the dry conditions in August of 2025.
I swapped the standard Smartwater bottle caps with these push/pull 28mm caps. I liked these caps for a few reasons:
- They are sturdy and eliminate the possibility of loosing a cap.
- They can be closed securely to avoid losing water during those times (more often than you think) when you are hiking in positions that turn your pack sideways and/or upside down.
- The caps can be opened/closed hands-free, thus limiting the amount of dirty hand contact with the part of the bottle that goes in your mouth.
I carried a 2L CNOC bladder which I used for water collection only - I never traveled with water in the CNOC bladder.
I often used my 750mL Toaks pot to scoop water into the CNOC, particularly in low-flow sources.
I filtered using a Sawyer Squeeze filter (CNOC->Filter->Blue Coupler->Smartwater Bottle). I liked this system a lot.
I used a short line to hang my CNOC from a tree during filtering. It was good to be able to multi-task while filtering water. The “blue coupler” is essential.
I avoided taking water from streams that were fed by swamps and/or beaver ponds.
I back-flushed the filter at every town stop. I never encountered the “slow filter” problem that some people complain about.
I used an electrolyte drink mix (Liquid IV) in my water once per day. I found this to be important for muscle cramp reduction.
I hiked in August 2025 during one of the most significant droughts in recent Vermont history. Lake Champlain reached a low water level not seen since 1934 during my hike. Several of the “reliable” water sources were dry. I was fairly conservative with my water carries and never had a major problem. Key things to remember during drought conditions:
- Talk with all SOBOs to get current information on water sources.
- Read FarOut comments closely.
- Carry water into dry shelters.
- Whenever you see an active water source, stop, drink all reserves (at least 700 mL), and refill. Better safe than sorry.
- “Seeping” water sources can be improved using large leaves and small stones. You’d be surprised how much water you can get from these apparently marginal sources.
- When in doubt, carry some extra.
- On the plus side, mud was not a major problem during the drought!
Food
I didn’t do anything particularly unusual here. I tried hard to maintain my calories during the trip but found that to be very difficult. From my experience, the spacing of the towns leaves no reason to be carrying more than 4 days of food at any given time.
I lost about 8 pounds during the hike, so obviously I wasn’t eating quite enough.
Food Storage
This topic is debated endlessly. I carried a BV450 bear canister and did not regret it. Be sure to put reflective tape on your canister and place it on a flat surface (away from cliffs) at night.
Keep in mind that you don’t need to fit your first dinner in the canister, so be sure to carry out something bulky and caloric after any resupply.
There are cons to the canister:
- The canister adds weight.
- The canister packs awkwardly.
- The canister limits your food carry somewhat.
There are also pros:
- Bear canisters are critter-proof (particularly important inside of shelters and bear lockers). In my experience on the LT, critters are a much larger risk than bears.
- I never spent time in the evening throwing bear lines into trees.
- I never worried about bears and/or other small critters on my trip. I slept soundly.
- The canister limits your food carry somewhat, which prevents over-carrying.
I would guess that 30% of the campsites I stopped at had bear lockers, so that makes things a bit easier. Keep in mind that bear lockers are not critter-proof.
Swimming
I got completely in the water about 8 times on the trip. It’s cold, but it helped my mental state a lot after going days without a shower. Stratton Pond, Griffith Lake, Pleiad Lake, and Sterling Pond are the obvious places. There are also several swimmable rivers along the way, mostly in the southern half of the trip. Big Branch (around mile 70) was the best one I remember. In the north there is a great swimmable river coming down into Johnson about two hours before you hit town. Little Rock Pond isn’t great for swimming. There are other places that I didn’t stop because they involved blue-blazes off the trail.
Conclusion
Hike the Long Trail end-to-end, you will not regret it.